How To Cut Your Own Hair
Cutting your own hair at home can save you tons of money, and it gives you more control over exactly how long or short you want your hair to be. Although an appointment with a professional hair stylist is usually your best bet for gorgeous locks, hairdressers don’t always get it right. (I’m sure we’ve all had a terrible experience with a hairdresser at one point or another, and then thought, “Oh gosh, even I could cut my hair better than this!”.) With a few tips and our handy guide on How To Cut Your Own Hair, you can cut your own hair safely and easily, with great results.
1. Do your research
Before you even think about cutting your own hair, it’s a good idea to do as much research as you can. Reading this article is the first step! We recommend watching YouTube videos to see the different methods in action, reading step-by-step articles on trimming your own locks, and asking your hairdresser for tips. Once you feel confident and you’ve decided to give it a go, it’s time to get ready.
2. Get advice from friends
It’s easy to get excited about cutting your own hair and then attempting to do it immediately, but it’s best to chat about it with your friends first. Ask for their advice, and perhaps ask them to be there when you try it for the first time. They can give you their opinions, and help out where needed. They may even have cut their own hair before, and have great tips for you! Organize a place and time to cut your hair so you can get everything ready well ahead of time.
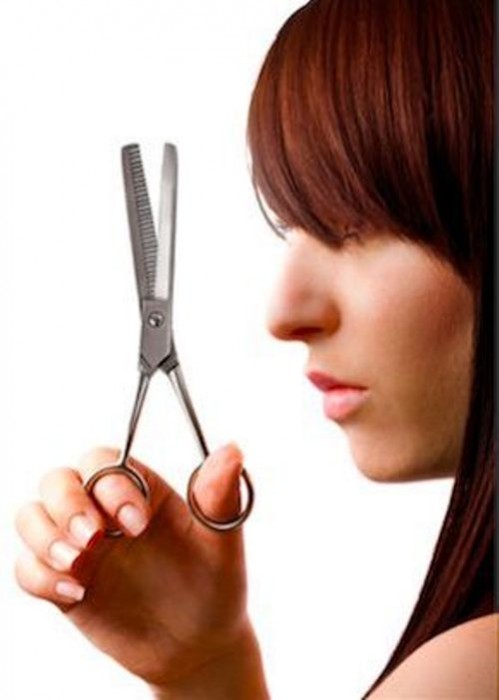
3. Get the correct tools

Whatever you do, never cut your hair with a normal pair of utility scissors, or the kitchen scissors. You will need a very sharp pair of professional hair cutting scissors if possible, or a pair of sharp fabric scissors. The sharper the better, as blunt scissors will damage your hair, causing breakage and split ends. You’ll also need a long fine-toothed comb to keep your hair sleek and tangle-free.
5. Prep your hair for cutting
Although most hairdressers cut hair when it’s wet, it’s best to cut your own hair when it’s totally straight and dry. Wet hair stretches, so it will dry significantly shorter than the length you have originally cut it to when wet. To avoid misjudging how much it shorter it will look, cut it when dry. Start with a thorough wash, with two rounds of shampoo and then a rich conditioner. After rinsing and blotting off excess water with a towel, blow dry your hair straight, or blow dry it and then straighten it with a flat iron. Comb it through very carefully to make sure there are absolutely no knots or tangles.
6. Practice, one inch at a time
The key to cutting your own hair successfully is to take your time, and to start by trimming only an inch or half an inch at a time. If you have thin hair, you probably won’t need to section it off much – maybe only two sections – before cutting it. With thick hair, it’s recommended that you create many sections so you can cut through your hair easily. Pin unused sections of hair up or back with hair clips so you can focus on one section at a time. It’s quite daunting when you snip that first tiny bit of hair off, but once you feel more comfortable with cutting your locks, it’ll feel more natural.
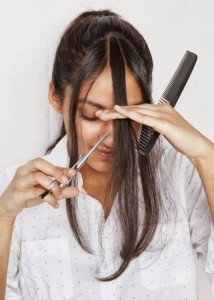
7. Cut sections straight across
Start by stretching out a thin section of hair, combing it carefully, and then holding it tightly between two fingers when pulling down – kind of like a hair straightener! See the image above – she is gently pulling and holding the section of hair down while she cuts it. You won’t be chopping off so much hair though, so only take about an inch or half an inch off, cutting straight across. Don’t worry if it looks too blunt, as you will be softening up the tips in the next step.
8. Cut straight up to even out ends

You’ll notice that cutting straight across at first will give you sharp, blunt ends. Remedy this with the second cutting technique of snipping upwards. Try to hold your scissors completely straight (vertically) and make tiny cuts to the straight lines of hair. This will soften the edges, making your hair look more natural and less choppy. Remember to do this to every section of hair you cut. You may want to leave your hair more blunt if you have fine hair, as it can make your hair look thicker and fuller.
9. Go slowly, combing hair frequently
Your first attempt may take a long time! Comb each and every section of hair before cutting, holding the section taut while you do so. Check each section carefully after cutting, and touch it up if it’s a bit wonky. That way, you will notice any problems before they mess up your entire look. And remember: you can always cut a bit more hair off, but you can’t replace hair, so be very careful when chopping your locks. A mirror is essential, so you can check your progress every few minutes.
10. Inspect!

Hopefully, everything has gone to plan, and you’re feeling confident and happy about what you’ve done. Fluff your hair out to remove excess hair, brush it well, and then take a good look at it in the mirror. Use a large mirror with good lighting, and a small hand mirror to see the back. If you notice any problem areas, simply go back and fix them. Your cut probably won’t be 100% perfect or totally symmetrical, but it will look fabulous regardless of how exactly the lines match up.
We recommend trimming about half an inch off your hair each month, and having it professionally styled once a year (unless, of course, you enjoy mixing your styles up several times a year). Soon you won’t even think twice about giving your tresses a quick trim in the bathroom on the weekend!
Popular Posts
-
 What Does it Mean When You Dream About Someone?
-
 What Does It Mean When You Dream About Your Crush?
-
 What Does It Mean When You Dream About Someone You Don’t Know?
-
 40 Cute Things to Text Your Boyfriend
-
 What Does It Mean When You Dream About Someone Who Is Already Dead?
-
 What Does It Mean When You Dream About Someone Dying?
4 Comments